What’s the best thing about summer? If you grew up or live somewhere hot, it’s jumping in and out of a refreshing backyard pool!
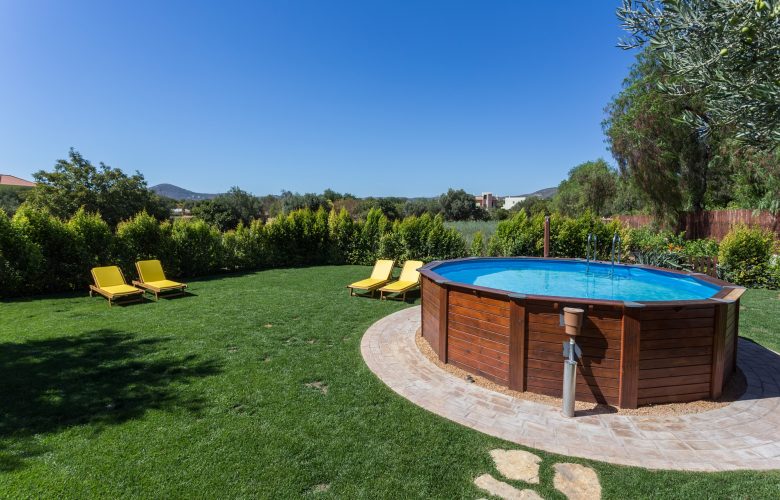
You don’t have to go through all the trouble of installing one in-ground. Above ground pools are great, more affordable, and temporary.
You can have your above ground pool for as long as you live in your home, or for a few years. If you’re motivated, you can break them down and move them with you.
Either way, you need to know how to install an above ground pool. Here’s a step by step guide below.
How to Install an Above Ground Pool
The first step is to find an above ground pool you like. You can buy some in stores but you’ll have more choices online. Find something that’s big enough for your family but small enough to fit the space you have in mind.
Once you have your pool in your car or on your doorstep, follow these tips below.
1. Rally the Team
You’re going to need at least one full weekend day to get your pool up and running. If you have older kids (10 and up) they can help with some of the installations.
Otherwise, you’ll want to find some friends to help you out. Give them access to your pool for the rest of your summer as an easy way to thank them.
Gather your team, have some water and snacks on hand, slather on the sunscreen and get to it!
2. The Foundation
You know how your parents would never let you put a slip and slide in the backyard? They always worried about the risk of something breaking through the vinyl and hurting you.
An above ground pool is the same idea. You need to make sure the area where the pool is going needs to be grass and debris free.
You can rent a sod cutter from a home improvement store to make this easier. Some types of grasses have no problem growing through the bottom of your pool.
Check the code for your county, some require grass removal around your pool as well.
Once you remove the grass, rake over the area and make sure everything is soft and smooth.
3. Level
Your pool needs to stand on flat ground, meaning you’ll need to level the area out.
Buy, borrow, or rent a level or transit, don’t trust your naked eye. If you don’t level your pool out, the structure can shift and ruin your pool.
Make sure everything is level and don’t build up low ground–dig out higher areas if there’s a significant difference. You may want to hire a pool company for this part.
4. Think About Drainage
Where will splashed-over water or overflow gather from your above ground pool? Do you have a drainage plan for your new backyard feature?
Some overflow is normal, so make sure the pool isn’t in the lowest part of your yard or some type of valley. You’ll worry yourself sick thinking there’s a leak in your pool when it’s the result of a few too many cannon balls.
5. Add Sand
You know those bags of play sand you buy for your kid’s sandbox or that sit unused in your garage? They’re great base material for your pool.
The soft sand protects the pool liner from anything sharp you didn’t find and cushions the floor of the pool.
There are additional options, like specialized pool floor pads, but we recommend using sand as a base either way.
You want your pool floor to be almost impossible to penetrate, so don’t be stingy with this step. Take the time to level the sand out before you start as well.
Two inches to four inches of sand under the pool is normal but your instructions may have a specific number.
6. Lay the Frame
You’ll need some structure for your pool base, which are usually patio blocks. Sink the patio blocks level with the top of the sand, they’ll keep your pool supports from sinking in.
Make sure there’s uniformity between the level of all the blocks–you want it to be perfect. Less than 1/16 of an inch difference is ideal.
7. Assembly
This is the step where your pool starts to look like a pool and not some crazy backyard sand volleyball court!
Read the instructions before you do anything. Have everyone who’s helping you read the instructions too. You don’t want any misplaced pieces.
Before you start, make sure you have every single piece, screw, nut, and bolt you need.
Create your cove–where the liner and the pool wall meet. Not doing so will cause the liner to slip out from the walls.
8. Liner
Inspect every inch of your pool liner as it’s very delicate. Once it passes your inspection, lay it out in the sun so it warms. It’ll be easier to move and work with once warm.
There should be no space between the wall liner and the floor of your pool. Read the instructions carefully and work slow–mistakes will cost you!
Smooth out the liner and use whatever excess they give you as needed.
9. Fill Your Pool
Hooray! You now have an above ground pool that looks like an above ground pool! Now you can start filling it.
Most people use a garden hose but don’t underestimate how long this takes. It’s a lot of water and you’re looking at hours to fill it up.
Get Swimming
After all the time you spent learning how to install an above ground pool and putting in the work, take a dive! Even if it’s the next day, you’ll be grateful to have the cool water on your skin.
Set rules for your family regarding the pool and get ready to have summers full of fun!
Want to transform more outdoor spaces or make your indoors a paradise as well? Check out our blog!